CapRover
Table of Contents
- Introduction
- Requirements
- Configs Tab
- Admin and Workers Tabs
- The Domain Name
- How to Know the IP Address
- How to Access the Admin Interface
- How to Work with CapRover
Introduction
CapRover is an extremely easy to use app/database deployment & web server manager for your NodeJS, Python, PHP, ASP.NET, Ruby, MySQL, MongoDB, Postgres, WordPress (and etc...) applications!
It's blazingly fast and very robust as it uses Docker, nginx, LetsEncrypt and NetData under the hood behind its simple-to-use interface.
- CLI for automation and scripting
- Web GUI for ease of access and convenience
- No lock-in! Remove CapRover and your apps keep working!
- Docker Swarm under the hood for containerization and clustering
- Nginx (fully customizable template) under the hood for load-balancing
- Let's Encrypt under the hood for free SSL (HTTPS)
Caprover is a very cool management app for containers based on Docker Swarm.
It has following benefits :
- easy to deploy apps (in seconds)
- easy to create new apps
- super good monitoring
- can be extended over the TFGrid
Requirements
- Make sure you have a wallet
- From the sidebar click on Orchestrators
- Click on CapRover
Configs Tab
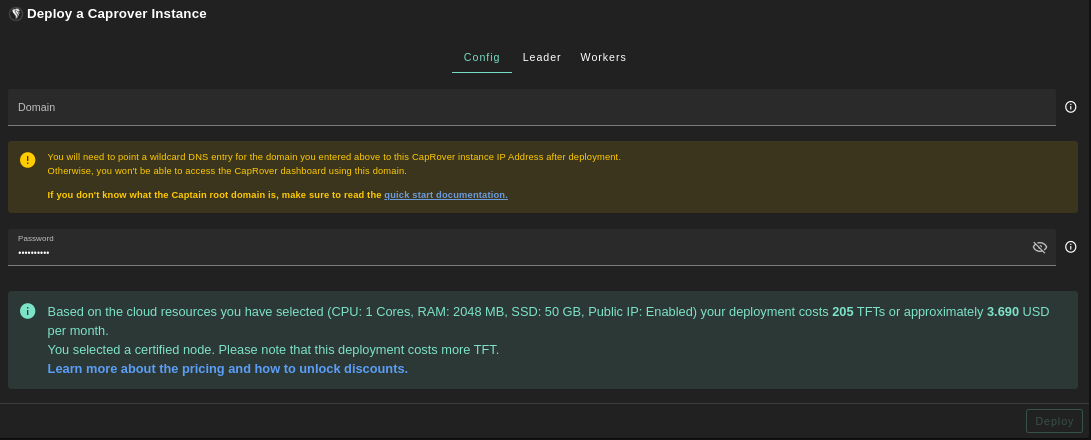
- Enter domain for you Caprover instance, Be very careful about the domain name: it needs to be a wildcard domain name you can configure in your chosen domain name system.
- Enter password for you Caprover instance.
Admin and Workers Tabs
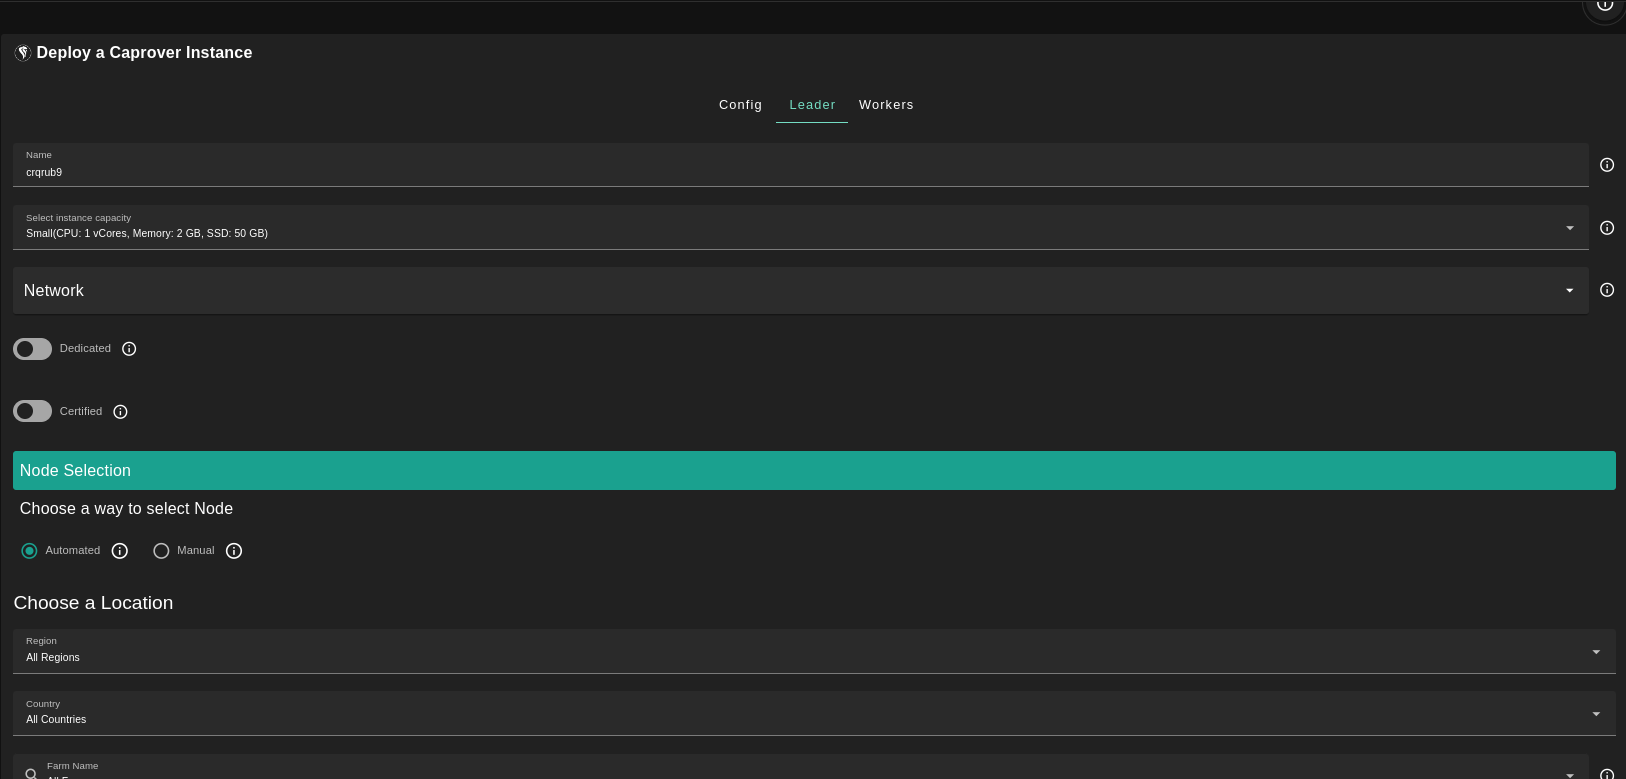
 Note: Worker nodes only accept SSH keys of RSA format.
Deployment will take couple of minutes.
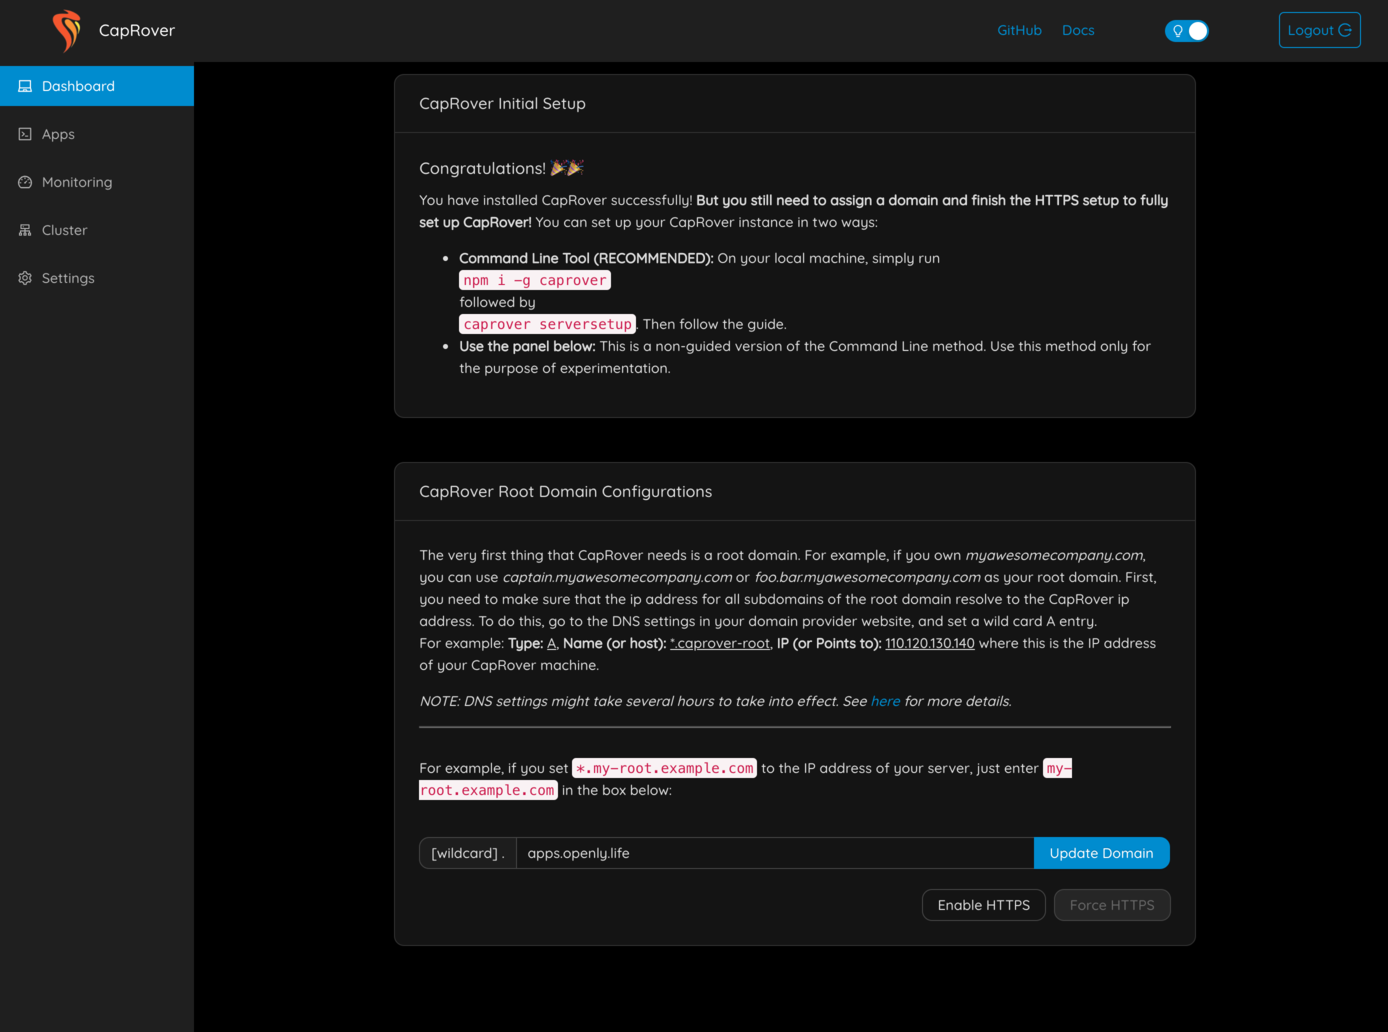
The Domain Name
As per the CapRover documentation, you need to point a wildcard DNS entry to the VM IP address of your CapRover instance. You have to do this after having deployed the CapRover instance, otherwise you won't have access to the VM IP address.
Let’s say your domain is example.com and your subdomain is subdomain. You can set *.subdomain.example.com as an A record in your DNS settings to point to the VM IP address of the server hosting the CapRover instance, where * acts as the wildcard. To do this, go to the DNS settings of your domain name registrar, and set a wild card A record entry.
On your domain name registrar, you can manage your DNS settings as such, with subdomain as an example:
| Record | Host | Value | TTL |
|---|---|---|---|
| A | @ | VM IP address | Automatic |
| A | subdomain | VM IP address | Automatic |
| A | *.subdomain | VM IP address | Automatic |
We note here that @ is the root domain (@ takes the value of your domain name, e.g. example in example.com), subdomain is the name of your subdomain (it can be anything you want), and *.subdomain is the wildcard for subdomain. If you don't want to use a subdomain, but only the domain, you could use a wildcard linked to the domain instead of the subdomain (e.g. put * instead of *.subdomain in the column Host).
Once you've point a wildcard DNS entry to your CapRover IP address and that the DNS is properly propagated, you can click the Admin Panel button to access CapRover. This will lead you to the following URL (with subdomain.example.com as an example):
captain.subdomain.example.com
Note that, to confirm the DNS propagation, you can use a DNS lookup tool. As an example, you can use the URL captain.subdomain.example.com to check if the IP address resolves to the VM IP address.
Domain Name Example
In the following example, we pick apps.openly.life which is a domain name that will point to the IP address of the CapRover instance (which we only know after deployment).

Note how the *.apps.openly.life points to the public IPv4 address that has been returned from the deployment.
How to Know the IP Address
Go back to your CapRover weblet and go to the deployment list. Click on Show Details.
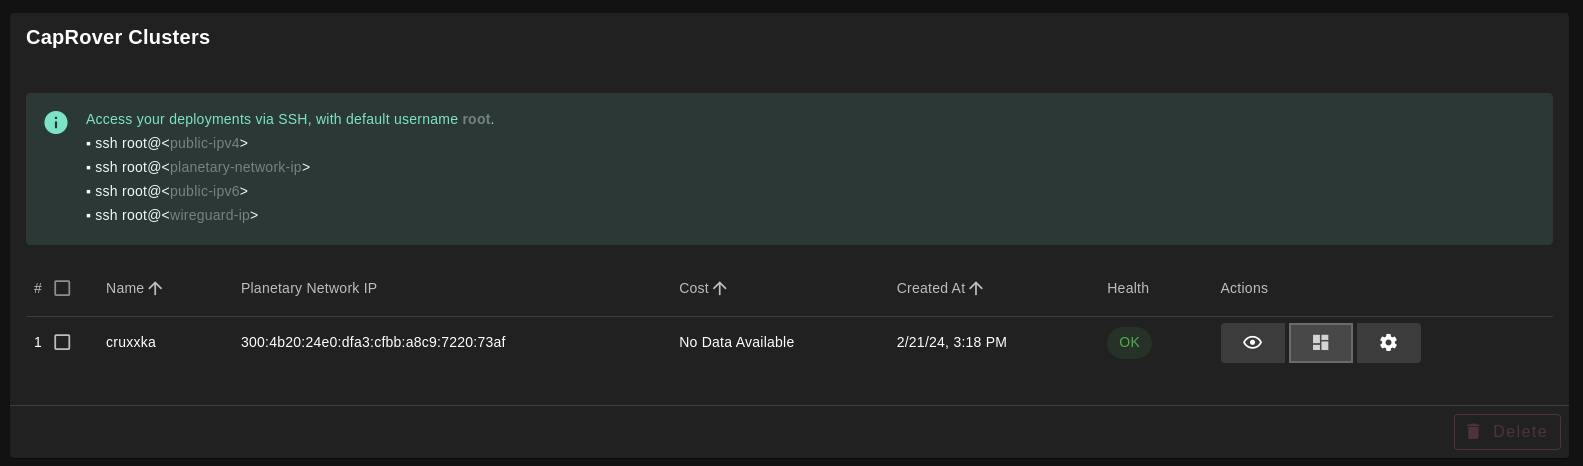
- The public IPv4 address is visible in here
- Now you can configure the domain name (see above, don't forget to point the wildcard domain to the public IP address)
Click on details if you want to see more details
{
    "version": 0,
    "name": "caprover_leader_cr_156e44f0",
    "created": 1637843368,
    "status": "ok",
    "message": "",
    "flist": "https://hub.grid.tf/samehabouelsaad.3bot/tf-caprover-main-a4f186da8d.flist",
    "publicIP": {
        "ip": "185.206.122.136/24",
        "gateway": "185.206.122.1"
    },
    "planetary": false,
    "yggIP": "",
    "interfaces": [
        {
            "network": "caprover_network_cr_156e44f0",
            "ip": "10.200.4.2"
        }
    ],
    "capacity": {
        "cpu": 4,
        "memory": 8192
    },
    "mounts": [
        {
            "name": "data0",
            "mountPoint": "/var/lib/docker",
            "size": 107374182400,
            "state": "ok",
            "message": ""
        }
    ],
    "env": {
        "SWM_NODE_MODE": "leader",
        "CAPROVER_ROOT_DOMAIN": "apps.openly.life",
        "PUBLIC_KEY": "ssh-rsa AAAAB3NzaC1yc2EAAAADAQABAAABAQC/9RNGKRjHvViunSOXhBF7EumrWvmqAAVJSrfGdLaVasgaYK6tkTRDzpZNplh3Tk1aowneXnZffygzIIZ82FWQYBo04IBWwFDOsCawjVbuAfcd9ZslYEYB3QnxV6ogQ4rvXnJ7IHgm3E3SZvt2l45WIyFn6ZKuFifK1aXhZkxHIPf31q68R2idJ764EsfqXfaf3q8H3u4G0NjfWmdPm9nwf/RJDZO+KYFLQ9wXeqRn6u/mRx+u7UD+Uo0xgjRQk1m8V+KuLAmqAosFdlAq0pBO8lEBpSebYdvRWxpM0QSdNrYQcMLVRX7IehizyTt+5sYYbp6f11WWcxLx0QDsUZ/J"
    },
    "entrypoint": "/sbin/zinit init",
    "metadata": "",
    "description": "caprover leader machine/node"
}
How to Access the Admin Interface
Make sure that you've point a wildcard DNS entry to your CapRover IP address (e.g. 185.206.122.136 in our example), as explained here.
-
To access the CapRover admin interface, you can click the Admin Panel button or you can use the following admin URL template: https://captain.subdomain.example.com.
- Note the prefix captain and the usage of our wildcard domain.
-
The admin password is generated and visible behind the
Show Detailsbutton of your CapRover deployment.
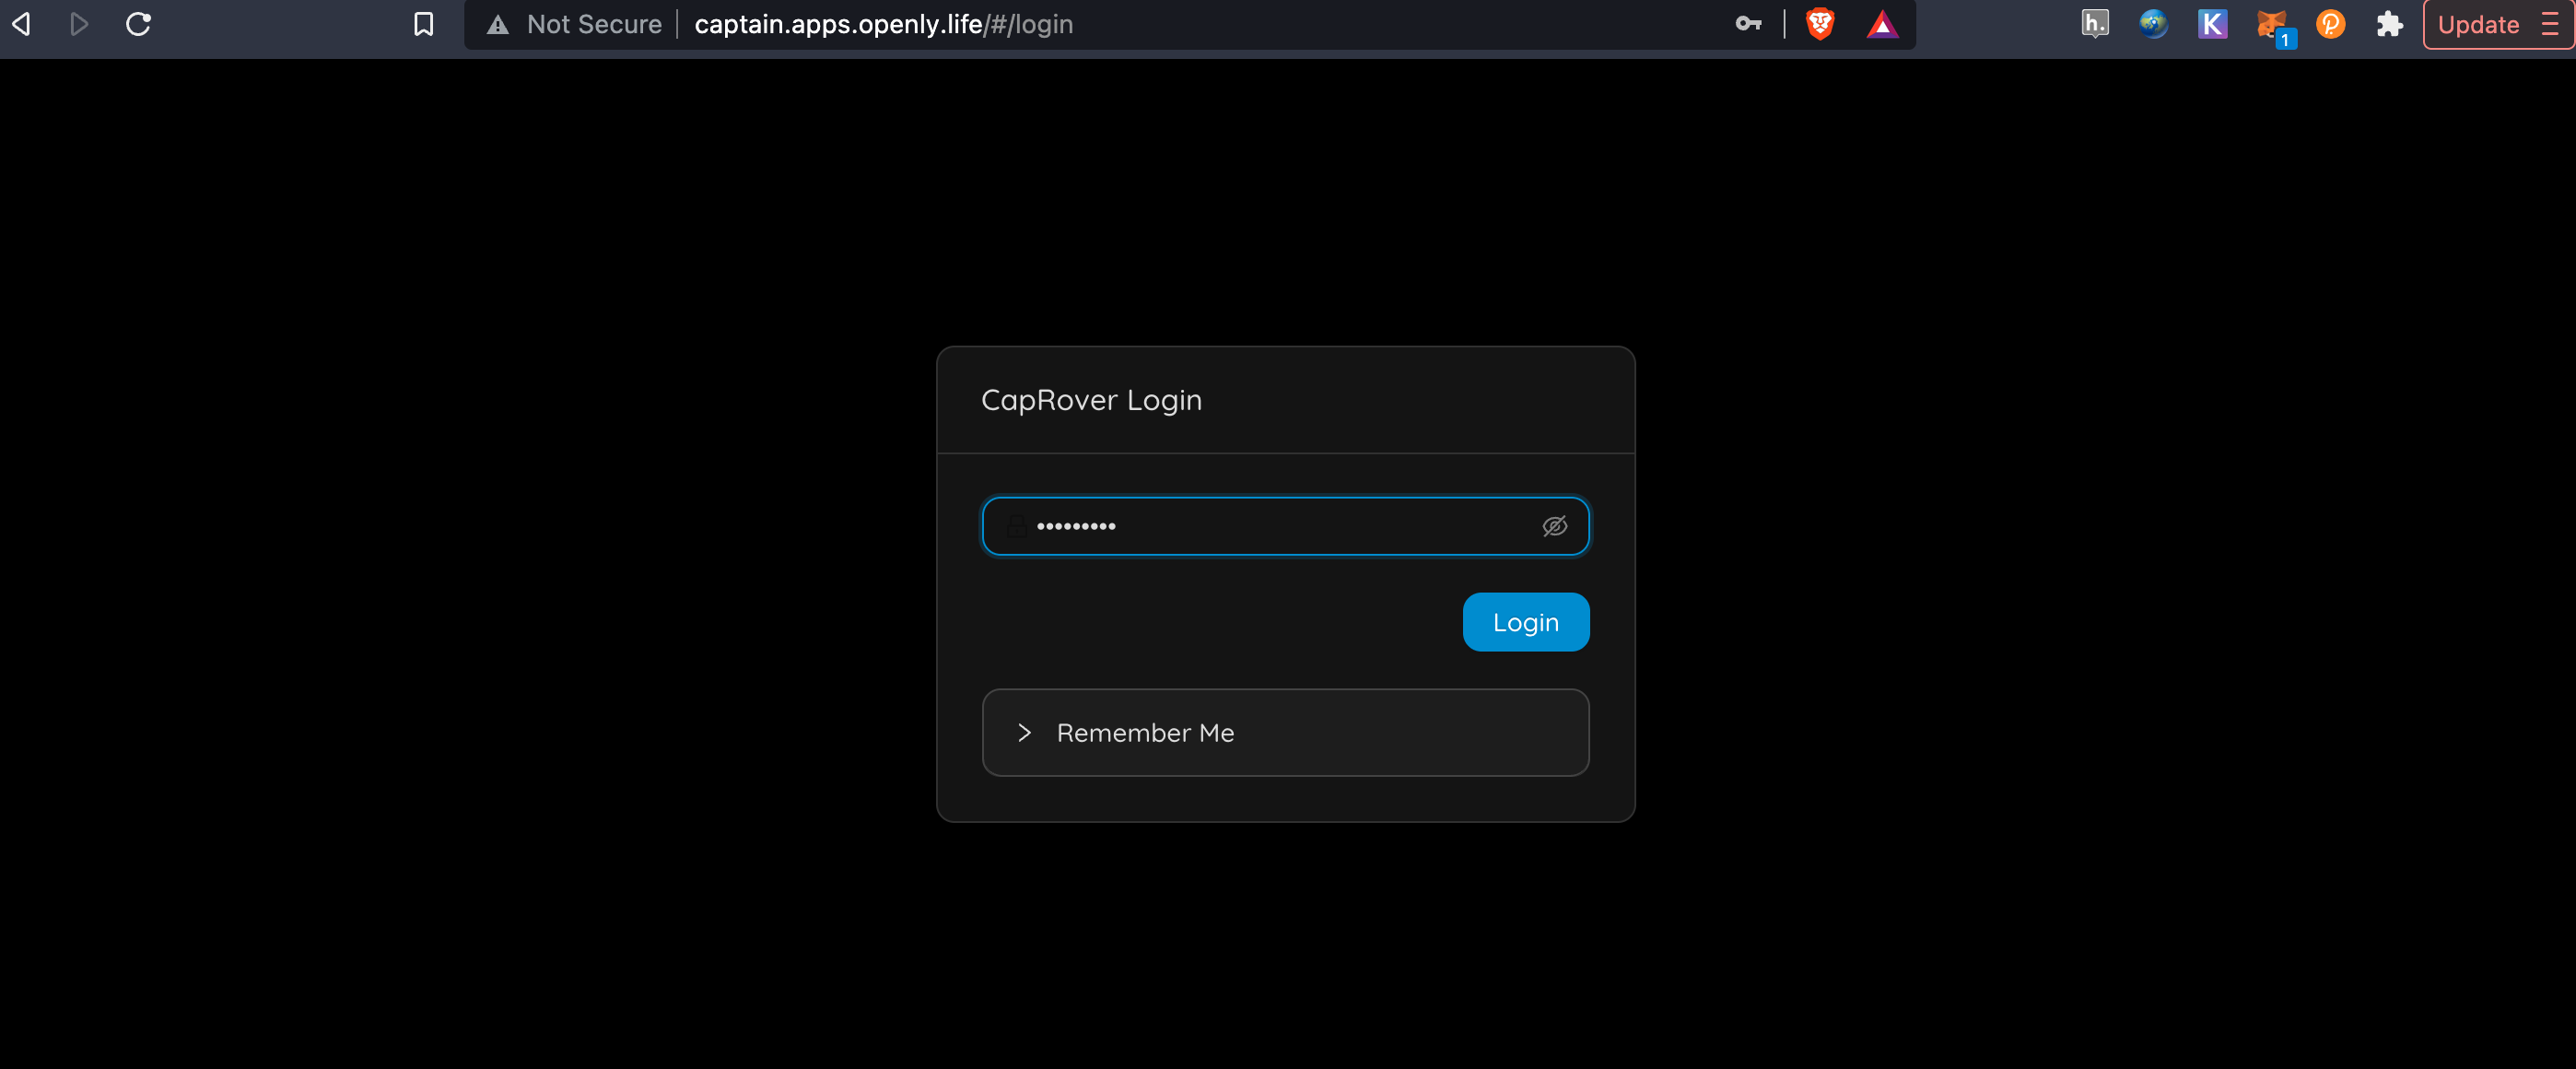
- You should now see the following screen: