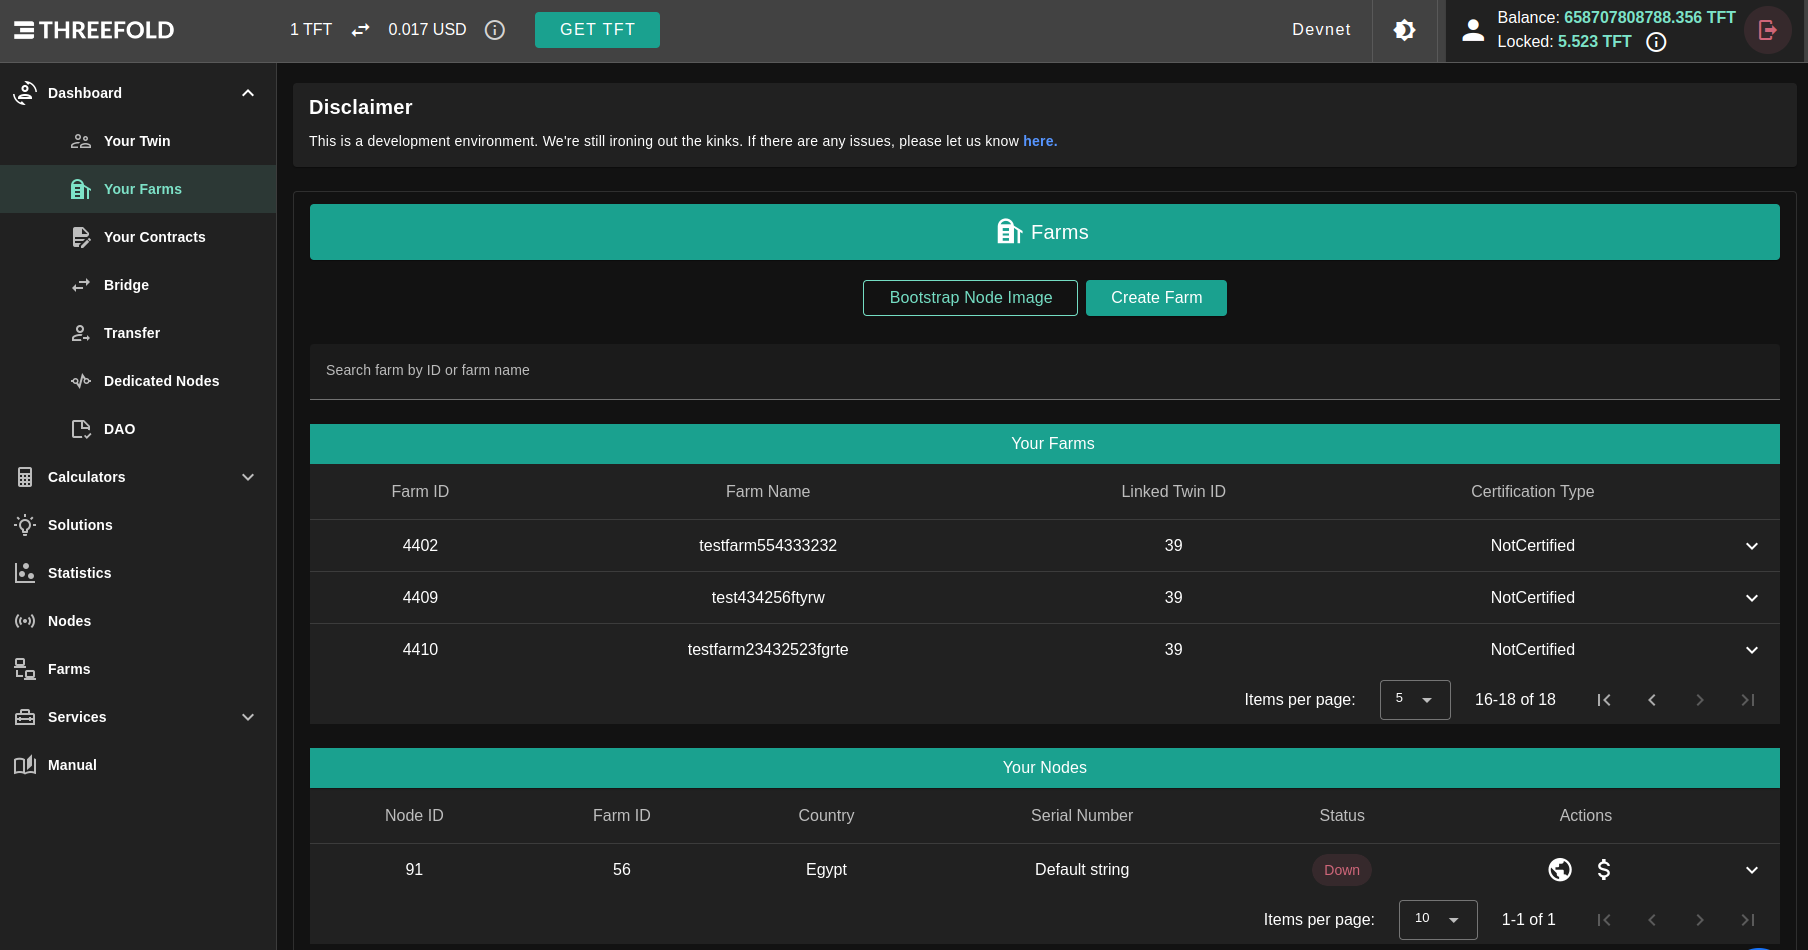
Farms
This comprehensive guide aims to provide users with detailed instructions and insights into efficiently managing their Farms. Farms encompass servers and storage devices contributing computational and storage capabilities to the grid, empowering users to oversee, maintain, and optimize their resources effectively.
Getting started
After logging in to the TF Dashboard, on the sidebar click on Dashboard then Your Farms .
Create a new Farm
If you want to start farming, you need a farmID, the ID of the farm that is owning the hardware node(s) you connect to the TFGrid.
Currently on:
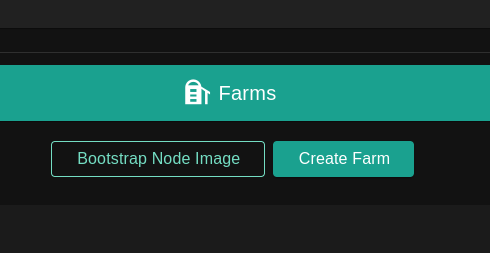
Click Create Farm and choose a name.
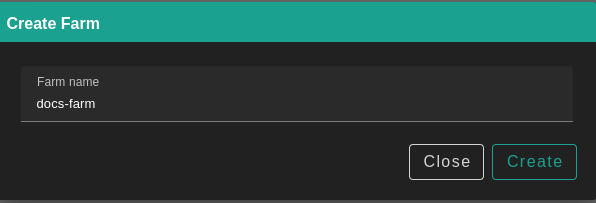
Click on Create.
The farm is by default set up as 'DIY'. A farm can become certified through certification program. Also a pricing policy is defined. Pricing policy is currently the same for all farms, the field is created for future use.
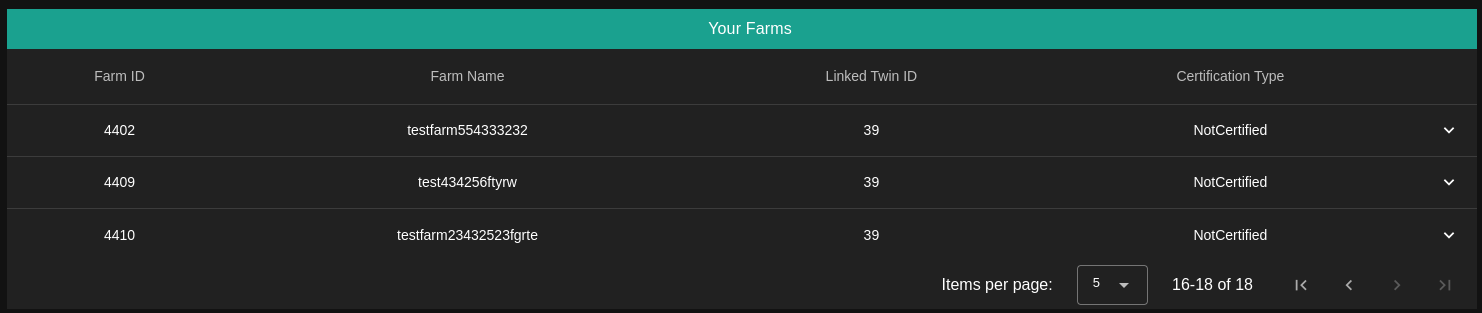
Manage Your Farms
You can browse your Farms in Farms table; Farms table contains all your own farms and its your entry point to manage your farm as in the following sections.
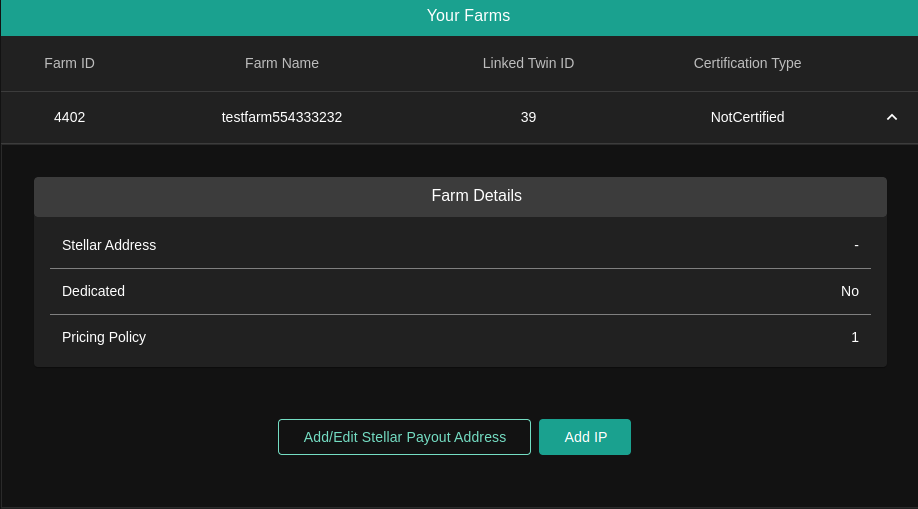
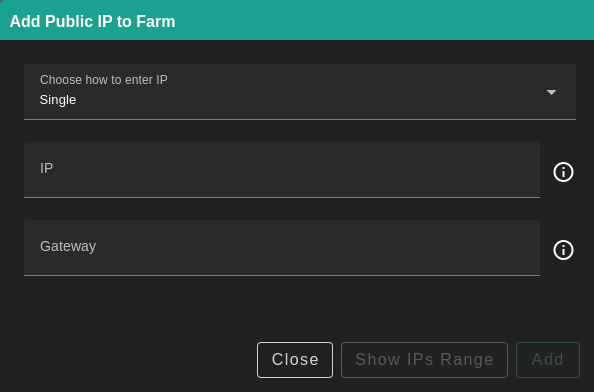
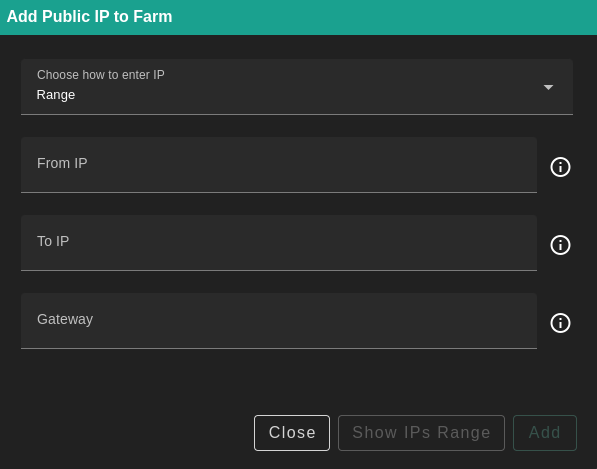
Add a public IP to your Farm
If you have public IPv4 addresses available that can be used for usage on the TFGrid, you can add them in your farm.
Click ADD IP, specify the addresses, the gateway and click CREATE.
You can add them one by one or using range of IPs.
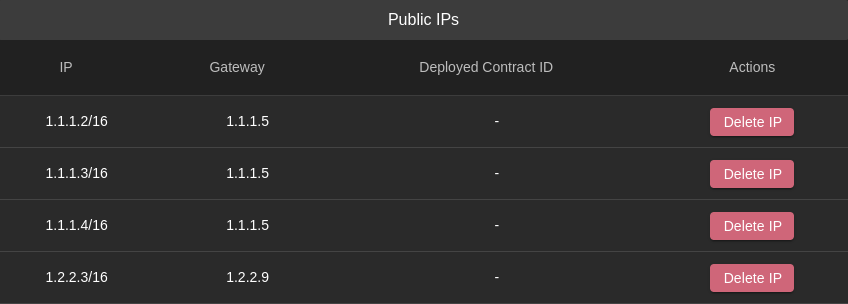
Some notes about adding a new IPs:
- Be careful not to create a new IP range that contains an IP address that already exists; doing so will result in an error.
- Verify that both the gateway address and the IP address are correct.
- Be careful not to include the same gateway address in a new IP range.
Deleting IPv4 addresses is also possible here. The Deployed Contract ID gives an indication of whether an IP is currently used. If it is 0, it is safe to remove it.
Add a Stellar address for payout
In a first phase, farming of tokens still results in payout on the Stellar network. So to get the farming reward, a Stellar address needs to be provided.
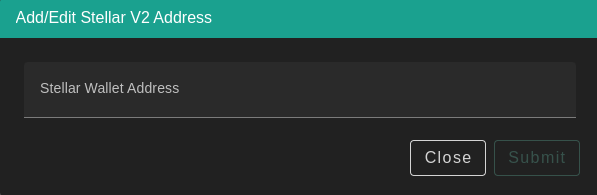
You can read about different ways to store TFT here. Make sure to use a Stellar wallet for your farming rewards.
Generate your node bootstrap image
Once you know your farmID, you can set up your node on TFGrid3. Click on Bootstrap Node Image.
Read more Zero-OS bootstrap image here.
Additional information
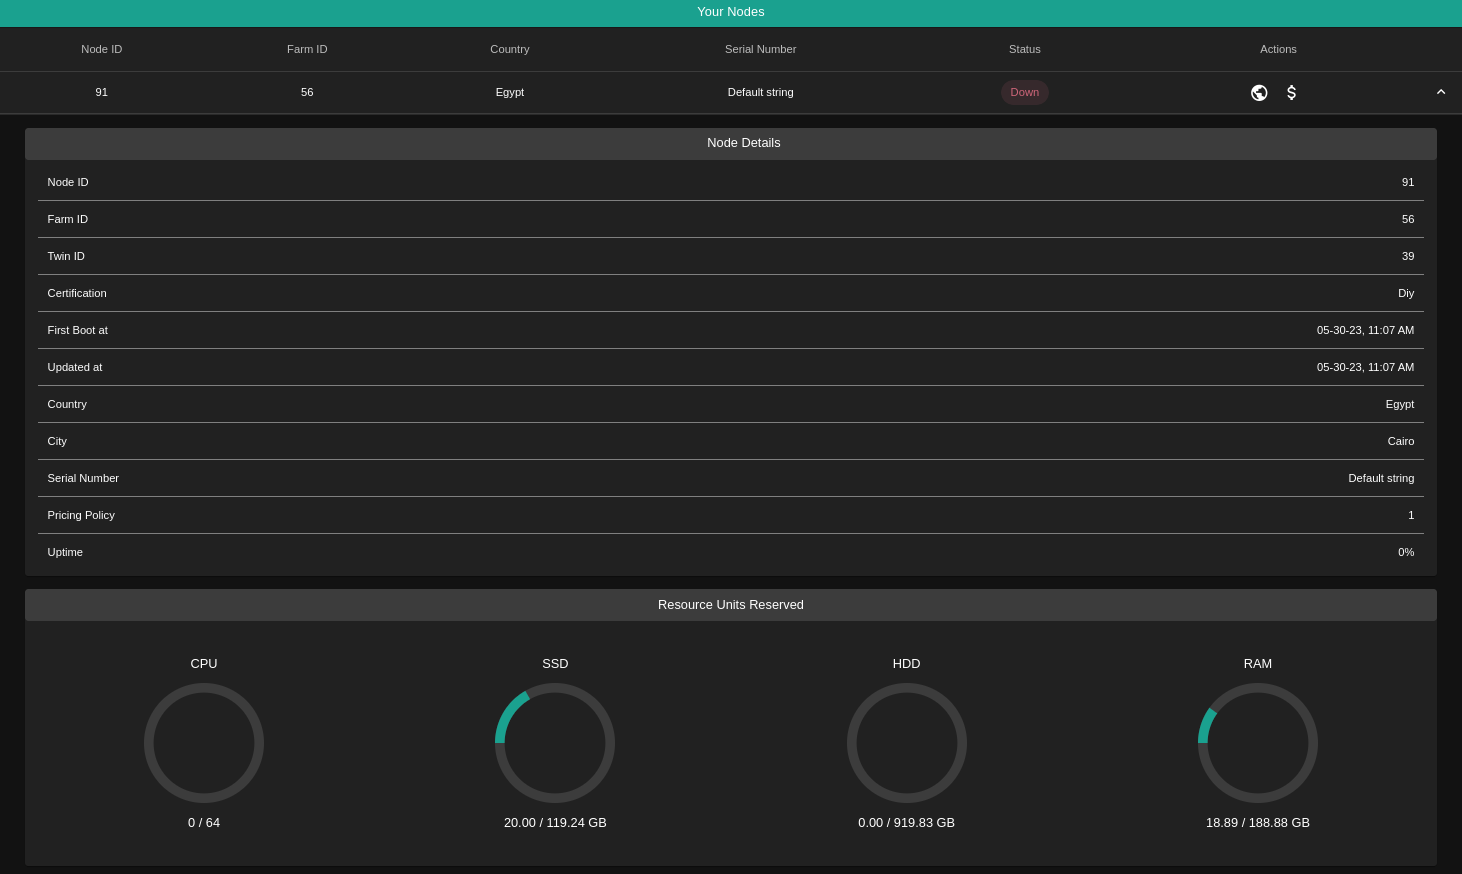
After booting a node, the info will become available in Your Nodes table, including the status info along with the minting and fixup receipts.
Clicking on the node statistics will open up a calendar where you can view the periods the node was minting or undergoing a fixup. Clicking on the periods will show a popup with the start and end datetimes, receipt hash and the amount of TFTs minted (if it is a minting receipt).
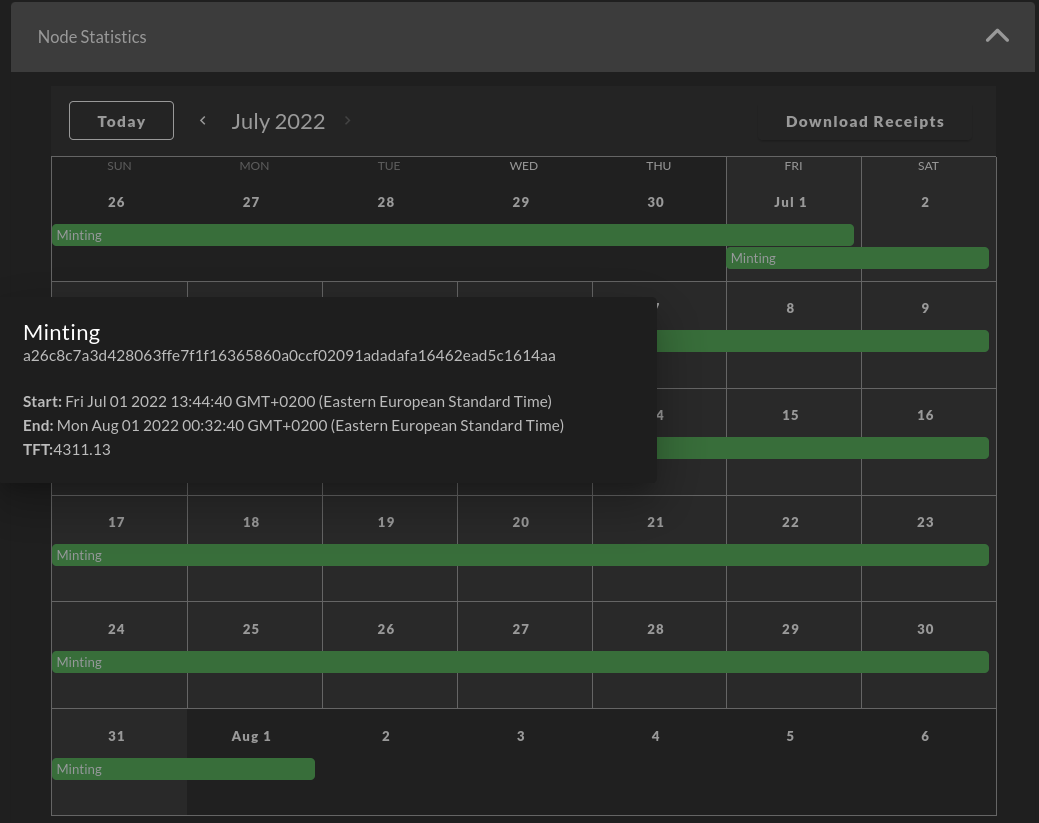
You can also download a single node's receipts using the Download Receipts button within the node statistics. Moreover, you can download all of the nodes' receipts using the Download Receipts button on the top left corner of the farm nodes table.
Manage Your Nodes
as in farms table Nodes table contains all your own nodes and its your entry point to manage your farm as in the following sections.
Node information
Expand your node information by clicking on the expand button in the target node row.
Extra Fees
You can set a price for the special hardware you’re providing e.g. GPUs while renting.
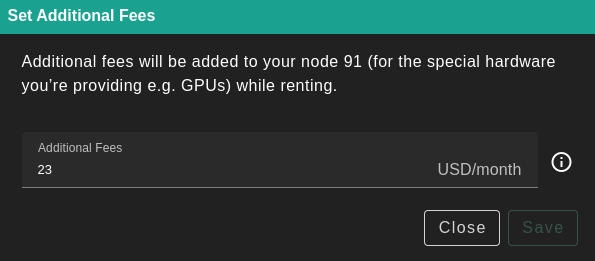
- Under the Your Nodes table, locate the target node and click Set Additional Fees under Actions
- Set a monthly fee (in USD) and click Save
Public Configuration
To configure public IP addresses to a specific Node
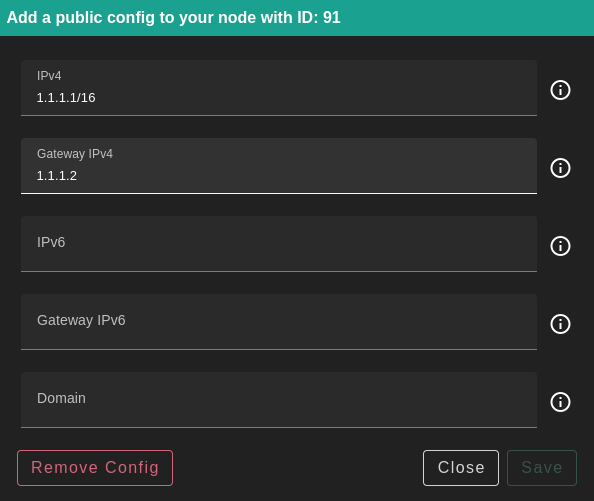
- Under the Your Nodes table, locate the target node and click Add a public config under Actions
- Fill in the necessary information and click save. Only the IPv4 address and gateway are necessary.
The IPv6 address and the Domain are optional but if you provide The IPv6 you have to provide its Domain.
The Difference Between IPs Assigned to Nodes Versus a Farm
IPs assigned to a farm are available to be rented by workloads. They can be assigned to virtual machines for example. IPs assigned to nodes enable each node to become a gateway.